NO POWER TOOLS NECESSARY
Installation Instructions:
Make your home a beautiful space to host in with a wood plank wall installed in ONE day.
CALCULATE YOUR SQUARE FOOTAGE
Grab a tape measure and jot down the height (vertical) in inches and the width (horizontal) in inches. Here’s the secret formula, Height (inches) x Width (inches) ÷ 144 = Your Square Footage. Always allow about 10% for work losses.
GETTING STARTED
– Boards add approximately 3/8″ to the wall thickness.
– Our Reclaimed Barnwood wall boards are not recommended for installation outdoors, on floors, or in high moisture areas like showers or bathtubs.
– WARNING: These Barnwood boards are classified as a combustible material and must be installed with proper clearances from heat sources according to the fireplace, heater, or appliance manufacturers installation instructions.
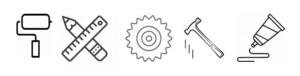
USEFUL TOOLS
Step Ladder • Stud Finder • Straight Edge • Level
Installation Instructions
– Unbox your boards. For best results, allow the boards to acclimate to the room conditions prior to installation. Spread out the boxes with the boards lying flat on a solid surface. (Approx. 24 hrs)
– Align your boards on the floor to visualize how your layout will look before you begin attaching to the wall. Determine the direction in which you chose to install your boards.
Locate the wall studs’ centers and use a light vertical pencil line to mark the location with a level.
Note that studs may not be exactly 16″ or 24″ apart especially if there are windows or other openings in the wall. Locating each stud will allow you to place board ends over the stud, so both pieces can be nailed securely to it.
– Paint the wall. Apply a dark colored primer on your wall before installing your barnwood boards. Allow the wall to dry before installing the boards.
– Level. Make sure to start the first row with a level.
– Width. Use the same boards width to complete each row.
– Cross cutting to length with a power saw is recommended. We also recommend you make cuts as you install the boards on the wall to ensure you have accurate length measurements to minimize unnecessary waste. For your safety, always cut wood products in a well-ventilated area using safety glasses, a dust mask, and gloves. Be sure to read manufacturer specifications and instructions before operating any power equipment. If you need to cut the width of the boards, we recommend using a circular saw. Simply measure the area of wall left to cover to get the width measurement, then cut the board(s) to match. Boards can be uneven even after trimming and may also show small holes. Boards can be split in 2 during unpacking which will not show once installed.
– Fixing the boards. Fix the boards to your wall using finishing nails. Construction glue may also be used.
The ends of adjacent boards should meet at the center of a stud for proper attachment. If there is no baseboard, allow for a small gap between the floor and the bottom of the first plank.
Follow the manufacturer’s installation instructions and remember that our barnwood boards add approximately 3/8 inch to the wall thickness.